Recent Posts
We install Travertine Patios in Dayton, Mason, and Columbus, Ohio
If you don’t live in our service area (Dayton, Cincinnati, Columbus Ohio), we would be happy to share our travertine supplier with you. They have the highest quality travertine pavers, and we’ve tried it all.
Over the past year, we’ve seen a spike in the mid to high end project with travertine. Travertine has been popular for many years indoors, but recently it’s been making it’s way into outdoor living spaces as well.
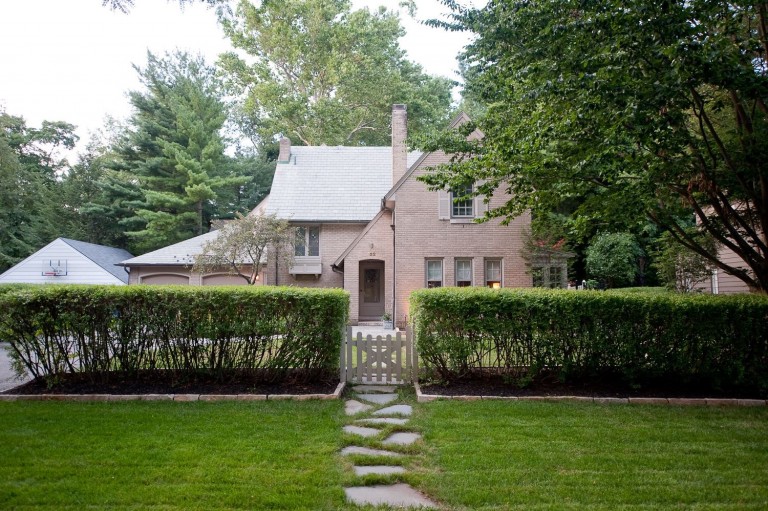
Here are a couple travertine patios we’ve installed recently.


Is Travertine Affordable?
Travertine is a beautiful natural stone that is quite affordable compared to other types of natural stone. In fact, it is very comparable to a middle range concrete paver. Although there are a few places in the world where travertine is imported, the best sources are located in Turkey.

Travertine comes in a few different color options. Here are just a few. We have others, just don’t have pictures yet.

Benefits of Travertine Pavers:
Freeze-Thaw Resistant
Travertine Pavers and Tile allow moisture to migrate vertically through the stone, making them ideal for exterior installations in all types of climates.
Strength & Durability
More than twice the strength of concrete.
Cool Under Foot
Even in direct sunlight, Travertine Pavers and Tile stay cooler than other types of man-made and stone paver materials.
No Efflorescence
Unlike cementitious products, Travertine Pavers and Tile are not subject to efflorescence.
Non-Fading
Since Travertine is a natural stone, it is not subject to color fading inherent in other types of man-made pavers.If you would like to explore the idea of a travertine patio with us, we’re ready.
Leave us a comment!
A long lasting brick patio, driveway, or walkway is the result of a properly installed base. As with anything, foundation is the key. By the time you’ve finished reading this post on paver base installation you should know almost everything you need to know about properly installing paver base.
The first thing we must do is consider the excavation depth. The determining factors include things such as paver thickness and the application of the surface whether it be for pedestrian or vehicular use. Now there are a lot of advanced factors that can be considered, however, I’m just going to cover the basics and as a rule of thumb should be all that you need to achieve a structurally sound foundation for your paver surface. So to determine the excavation depth we need to know the thickness of the paver and the necessary thickness of paver base.
Determining the paver base depth is actually very simple. For pedestrian only applications, it is adequate to have a 6″ paver base depth. For light to medium duty vehicle applications it is adequate to have 10″ of paver base. In some locations paver base is deemed unnecessary, i.e. Florida. However, I say paver base is necessary regardless of the location.
Installing the paver base
Once the area has been excavated to the right depth and width (excavate wider by however many inches you have in base depth on each side) it’s time to compact the subgrade. For certain, there are more advanced techniques that we follow in compacting and testing subgrade compaction, but for the sake of the do-it-yourselfer I’m just going to give you the basics. Start by spreading a 1″ layer of the paver base material over the subgrade and run your vibratory plate compactor over the paver base 2 times in each direction. This will give a pretty good compaction to the subgrade preparing it for the remainder of base to be installed (high clay soils may require additional compacting techniques to achieve prime compaction as clay is compacted by kneading rather than vibrating).

Continue by adding paver base material in lifts or layers of 2″ at a time and compacting each lift twice in each direction. You may need to add moisture to the paver base material if it is dry. An indicator of dry paver base is dry dust being generated during compaction as well as material piles or trails that are created by the sides of the compactor.
Once you have lifted the paver base to the proper height it is important to check for low and high spots. As a rule of thumb, we generally try to achieve no more than a +/- 1/4″ variation in paver base height. The paver base should resemble the expected final patio/driveway appearance leaving way for a consistent 1″-1 1/4″ sand setting bed.
Notes: It is important that during compaction the entire plate be in contact with paver base material. Fill in any low areas or level off any high areas in the paver base prior to compacting. If a compactor approaches a small low spot, the plate of the compactor will bridge over the low spot and that particular spot may never receive compaction resulting in future settling of the paver surface.
[box type=”info”]Download our detailed step-by-step guide to proper paver base installation
[/box]
[one_half]
[/one_half]
[one_half_last]
[/one_half_last]
Leave us a comment!

It seems that more and more people are interested in building a raised paver patio. It gives elevation, dimension, and yard separation. What most people don’t know about raised paver patios is the failure rate. In the world of hardscaping (term used to describe the installation of interlocking patios and retaining walls), raised paver patios are among the most difficult installations to pull off successfully. Here is why:
The first thing I would suggest is remove all landscapers from your bidders list. Landscapers, although this doesn’t apply to everyone of them, can typically install simple patios and hardscape projects, but building a raised patio requires a company that has a tremendous amount of experience installing only hardscape projects to understand what to do and what not to do when building a raised patio.
The number one reason for raised patio failure is improper installation of fill and improper fill material selection. Fill is the material used to fill the void between the bottom of your pavers and the ground. In most instances, if you’re building a raised patio, you will be adding a substantial amount of fill material. It’s important to never use soil/dirt. Dirt, without having VERY large compaction equipment designed specifically for the compaction of dirt, is almost impossible to compact completely. I can almost guarantee if dirt is used as any type of backfill material below your hardscape, it will settle SUBSTANTIALLY.
Limestone 411’s for paver base in raised patio’s
Limestone 411’s aka Paver Base
So what do we use for fill material? The best option, depending on your location, is angular limestone chips with dust. In most places, this type of gravel is called limestone 411’s or limestone chips and dust. This is a mixture of 3/4″ angular pieces of limestone all the way down to dust. If you only used the 3/4″ pieces of limestone, there would be a lot of air pockets created in-between each stone allowing the stones to move around and settle after time. The addition of smaller stone pieces and dust combine together to achieve a very dense fill.
I almost forgot, NEVER EVER EVER use pea gravel or allow your contractor to use pea gravel. Pea gravel (very small round pieces of gravel) has been used under concrete for years as a base fill material. Could possibly be why most concrete you see is cracked (just kidding, but who knows?). Pea gravel is a highly lazy gravel, which means, under heavy loads the pea gravel migrates into neighboring soils because its round in shape and small. If you ever paid attention to where a driveway meets a garage floor you probably observed that the driveway was much lower that the garage floor. This is caused in most cases by the pea gravel under the driveway migrating into the material below the garage floor. If there is limestone 411’s below the concrete or paver driveway but there is pea gravel below the garage floor, the limestone 411’s could work its way into the pea gravel after time. In either case, we would use a geotextile fabric for material separation. Geotextile fabric is a tensile material used in stabalizing different soils and fill materials.

How do we compact the fill material? There are a couple important things to remember when compacting limestone 411’s. Have you ever picked up a handful of dirt that was bone dry and tried to compact it into a ball? It doesn’t work so well. But, if you add just the right amount of moisture, you have the perfect mud ball. The same thing applies to compacting limestone gravel. It’s important to add moisture to the gravel before/as you compact it. The moisture helps release the air and aids by bonding the dust to the stone chips. Secondly, its important to never compact more than 2-4 inches in depth at a time using standard mechanical compaction equipment. If you are a DIY, and plan to use a hand tamp, I wouldn’t compact more than 1″ in depth at a time. Make sure and buy plenty of gloves if you plan to use a hand tamp, as you will be tamping for a really long time. That being said, I HIGHLY recommend that you use a vibrating plate compactor to compact the base especially if you’re building a raised patio.
If by now you haven’t decided to hire a professional that specializes in the installation of hardscapes, you’re a brave soul.
Proper excavation prior to installation of fill material is just as important as the selection and compaction of fill material. Most will agree that 6″ of base below a paver patio is the proper amount. However, this doesn’t mean that you don’t have to excavate if your building a raised patio. I see it all the time; a contractor builds a raised patio and doesn’t excavate below the frost line and doesn’t remove the top soil. Top soil is simply organic matter like rotted roots and leaves.
So, you should still excavate at least 6″ prior to the installation of fill material for a raised paver patio.
Probably the third most common cause for raised paver patio failure is loss of fill material. If you’re familiar with all the general paver installation steps, you know that after the fill material aka the base comes the sand setting bed. Since the particle size of sand is so small, it’s easy for the sand to fall through the cracks/joints in the walls that build the patio up. You should always use a geotextile fabric to contain all fill materials when building a raised paver patio.
These are just a few of the most common causes that raised paver patios fail. Raised patio’s are typically much more labor and material intensive making them more expensive than paver patio’s closer to ground level. I can’t recommend enough times to contact a company that specializes in these types of installations.
If you’re located in Southwest or Central Ohio, please don’t hesitate to contact us for more information or to schedule a design consultation.
Thanks for reading- Mark Rhodus, President Two Brothers Brick Paving, LLC
If you’re not already, become our fan on Facebook for more great tips like these.
[one_half]
[/one_half]
[one_half_last]
[/one_half_last]
Leave us a comment!
This is a project we completed this year. The client contacted us in early spring with lots of ideas but couldn’t put them all together to create a space that made sense for their family and lifestyle. The design goals were to incorporate a pizza oven and outdoor kitchen that was easily accessible from the back door of the house into a tuscan inspired outdoor living space large enough to entertain their growing family and the large groups of friends and family that they often entertain. There were also substantial grade changes that had to be addressed without using typical man made materials that would take away from the tuscan style.
The Tuscan Inspired Outdoor Living Design

The Before

And The After


As the hardscape industry continues to grow and more and more companies are offering the installation of pavers, I thought it would be an appropriate topic to discuss what our installation consist of. It’s been my experience that anytime I’ve hired a company that specializes in their field I’ve gotten the best possible result. When a company specializes in a service like paver or hardscape installation, they are likely more knowledgable and experienced than others that offer the same service along with many other services or products. If you compare this scenario to the medical field I’m sure that you can easily see my point.
I’ve struggled to comprehend how a company can successfully be a jack of all trades. Anyways, let me get back on track. You can read more about this topic in a recent article I wrote discussing the difference between a Landscaper and a Hardscaper.
I believe the installation of hardscapes especially interlocking pavers has been changing to be more accommodating to the new installer or the do-it-yourself installer. What I mean by this is, manufacturers want their product to appear easy to install no matter your experience level so that they can sell more product. Before long, these shortcut techniques become the standard among new companies in the industry. I recently read something that is a little comical but also helps make my point here called the Five Monkey Rule. It’s when people keep doing things the same way they’ve always done them because thats the way it was done when they got there. They don’t ask why they’re doing it that way they just know thats the way its always been done.
So, here are our paver installation methods and why.
Proper Excavation and Base Depth: We believe that a paver patio in our climate (Ohio) must be installed over an adequate gravel base to eliminate settling. We install a minimum 6″ limestone gravel base for patios and walkways and 10″-12″ for vehicular applications like driveways . We only use limestone 1/2″-3/4″ stone (know as limestone 411’s or 304’s) with fines and refuse to use crushed concrete as our base material. We also pay special attention to the compaction depth of our compaction equipment. Most vibratory plate compactors are only rated to compact about 2″-3″ of base depth at a time. If more is attempted, base below that 2″-3″ depth will not receive compaction and will more than likely settle over time.
We also excavate 6″-8″ beyond the perimeter of the patio so that spikes we use to hold our edging is hammered into a rock hard base rather than neighboring soil.
Geotextile Fabric: We view geotextile fabric as cheap insurance which is why we install it under every patio we build. Many people believe the fabric is installed under the pavers to prevent weeds from growing through the joints which isn’t the case at all. Most weeds that grow in the joints of pavers start by a seed being blown in and deposited into the sand in the joint. Putting fabric below the pavers will not prevent weeds from growing (I will discuss below how properly installed pavers don’t grow weeds). So what is the fabric for? We install geotextile fabric between our limestone base and the soil. It has a very high tensile strength and helps to strengthen the soil by acting as a bridge over soft spots. We found this video that shows the difference adding geotextile makes to soil.
High Quality Pavers: We recently picked up an existing paver patio not installed by us and installed a new paver patio for a customer. Although there were some issues with original installation, the main reason this customer wanted their pavers replaced was due to the pavers deteriorating and because the pavers had lost most of their color. There are many paver manufactures out there that cut corners so that the cost of their product appeals to a larger demographic like manufacturers that make pavers for big box stores. We like to work with companies that stick to what they do best, which is our business model. In the paver manufacturing world, there are paver manufacturers and then there are block (cinder block) manufacturers that also manufacture pavers. We do not buy pavers from block manufacturers. Instead we buy from companies like Unilock, that specialize in making hardscape products. We also work with manufactures that have procedures in place to eliminate or at least minimize efflorescence.
Proper Drainage: Proper drainage is probably one of the most underrated characteristics of a successful paver patio. When water sits stagnant on pavers without anywhere to go the following can happen:
- At a minimum, your pavers will never appear clean. Water traveling over pavers is usually transporting silt, dirt, shingle particles and a variety of other things you don’t want sitting on your patio. If the water has no where to go, the grime will just sit on your patio.
- When water doesn’t escape your patio it makes the sand in the joints stay damp which is a breading ground for weeds, moss and mildew.
- Stagnant water weakens the soil below the pavers, the gravel base and the sand bed potentially causing settling in the pavers.
- Poor drainage usually results in increased efflorescence.

Bottom line is, you have to address how the water will get off the pavers. We do this by applying slope to the patio. At a minimum, we shoot for 1/4″ of fall in vertical distance per 1 foot of horizontal distance. In some instances where that can’t be achieved we decrease our slope to as low as 1/8″ per foot. See the diagram to the right. Often, if 1/4″ of slop or close to can’t be achieved, we consider installing drains in the patio and slope the patio to those drains. The drains can be connected to neighboring down spout pipes or drained out into the yard.
Detail in Cuts: We put a tremendous amount of detail into the cuts we make for each paver patio. It’s typically how well the cuts in a patio look that gives a patio that “installed by an expert’ look. Here are just a couple examples of the cutting detail you will find on our projects


Proper Edge Restraint and Installation: There is only one edge restraint we will use and that is PaveEdge made by PaveTech. This test proves that it is the best vs all other edge restraint options. In addition, this is the only edge restraint on the market that has a lip which slides underneath of the pavers. This lip seen in the diagram to the right helps prevent the edging from lifting away from the pavers.
Paver Sealer and Sand Stabilization: I recently wrote an article about polymeric sand vs regular sand with a joint stabilizing sealer that you can read to find out more about why we don’t use polymeric sand. Instead, we vibrate a course particle sand into the joints of the pavers filling the joints up and interlocking the pavers. We then use a product called Joint Stabilizing Sealer made by Surebond that will harden the sand in the joints to minimize weed growth, sand loss and insect invasion. In addition, since it’s a sealer it will help protect the pavers from stains and make the pavers easier to keep clean.
As you can see, we take what we do very seriously. If you’re interested in finding out more about us or if you would like to meet with us to discuss your project you can call us.
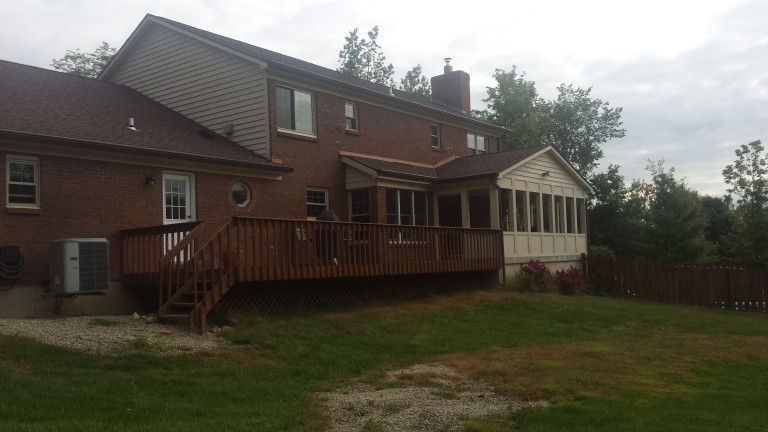
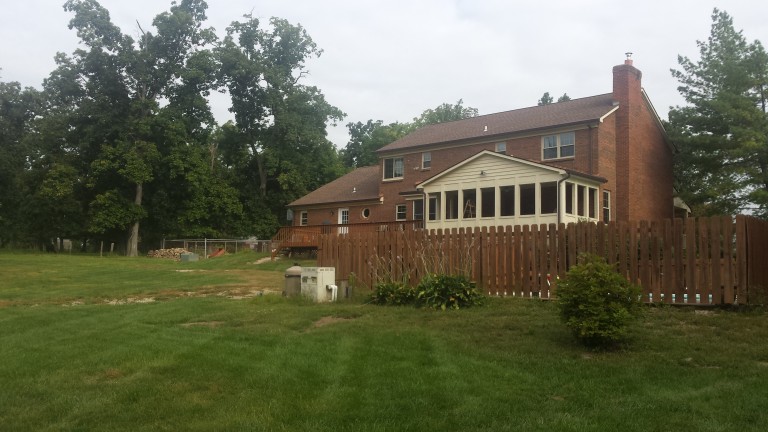
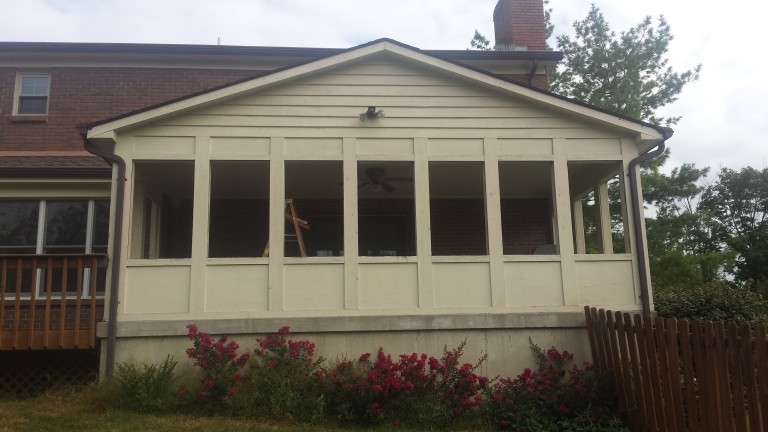
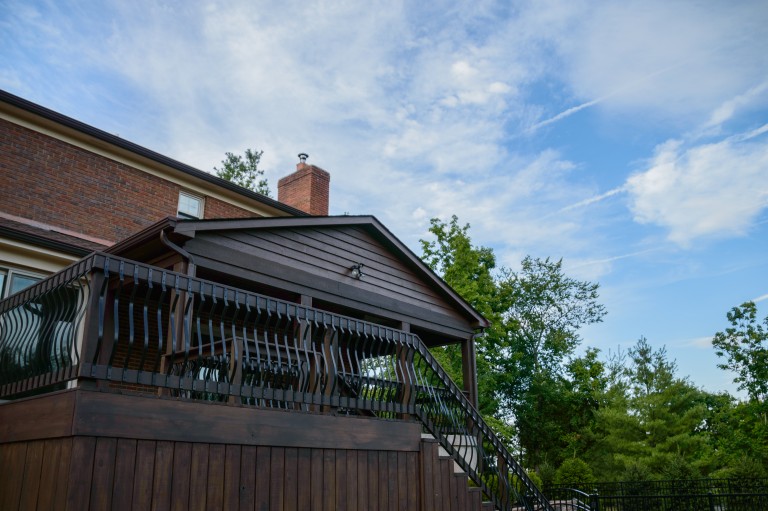
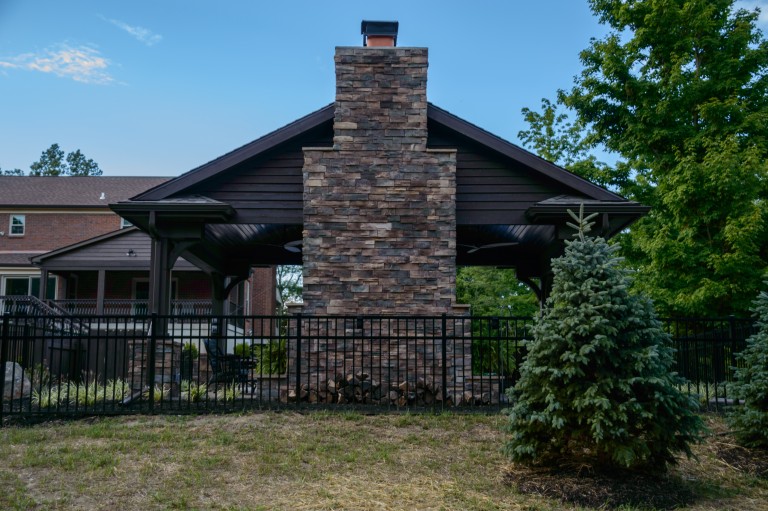
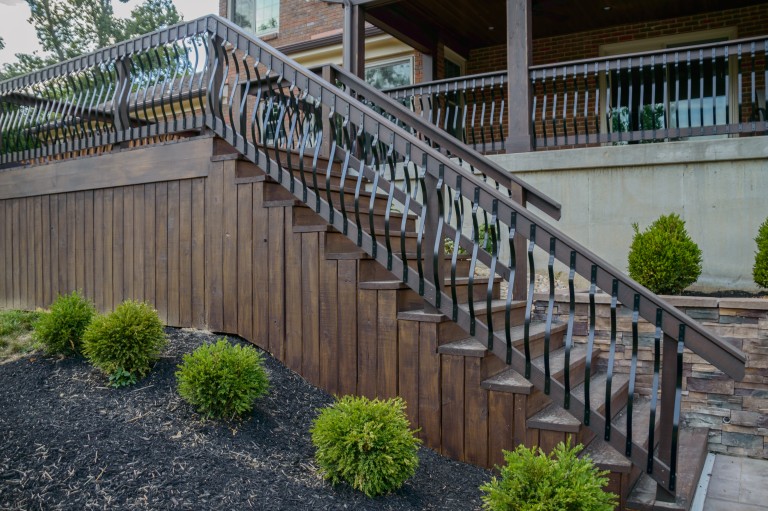
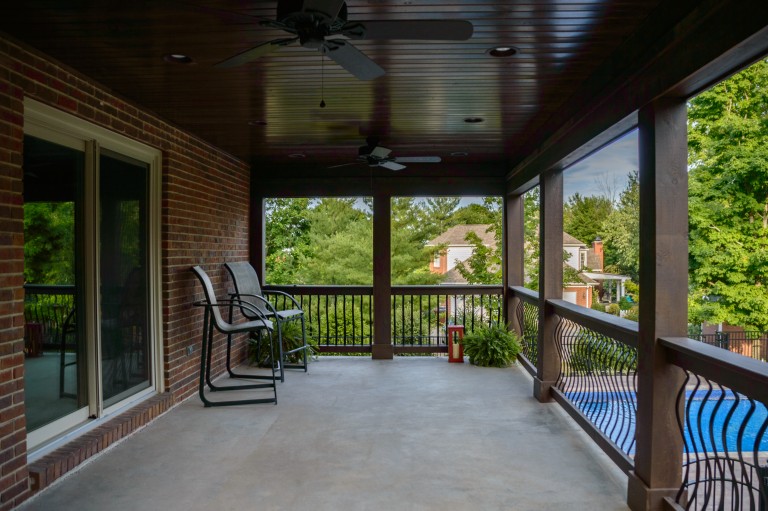
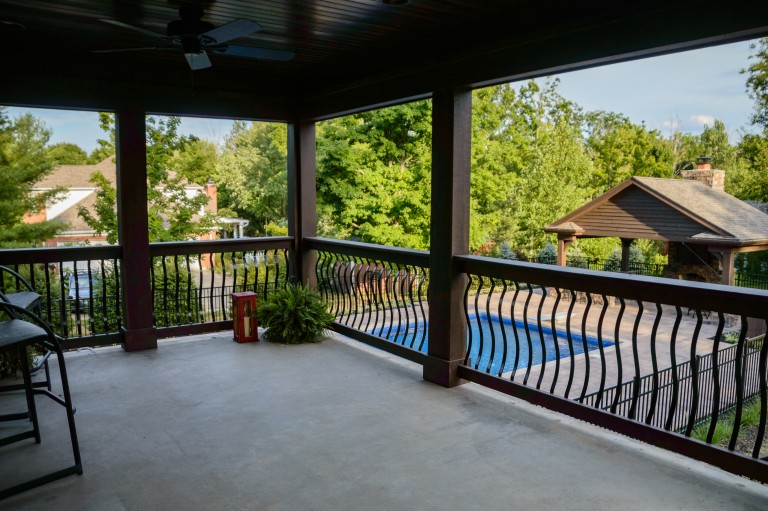
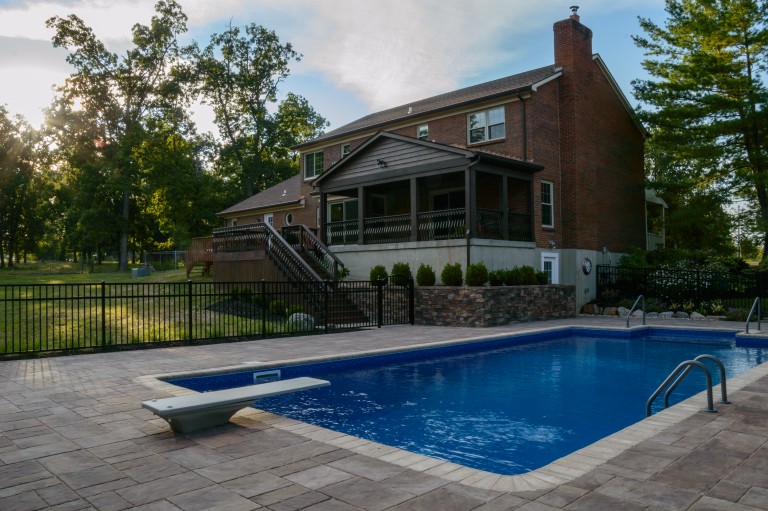
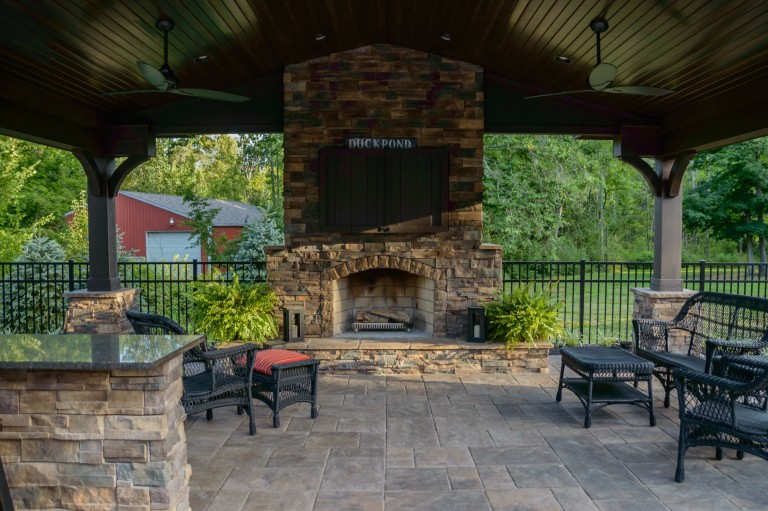
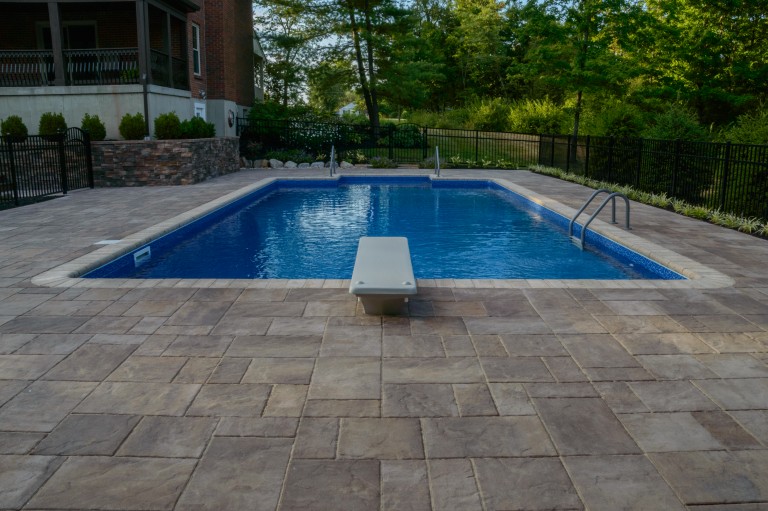
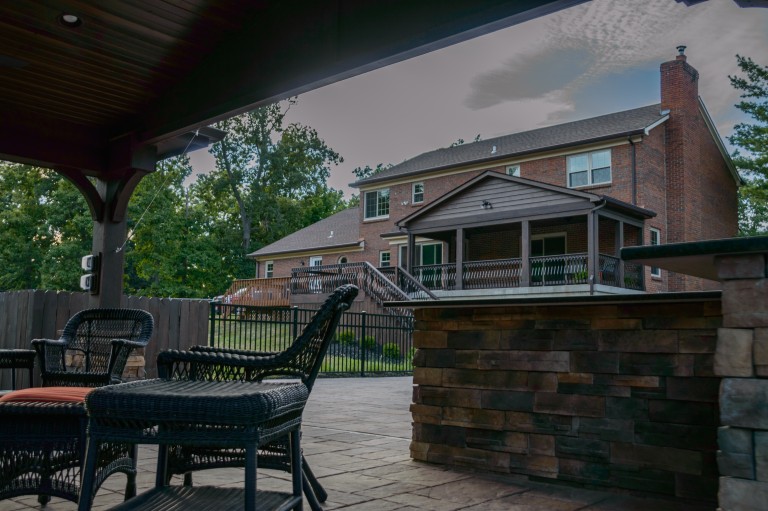
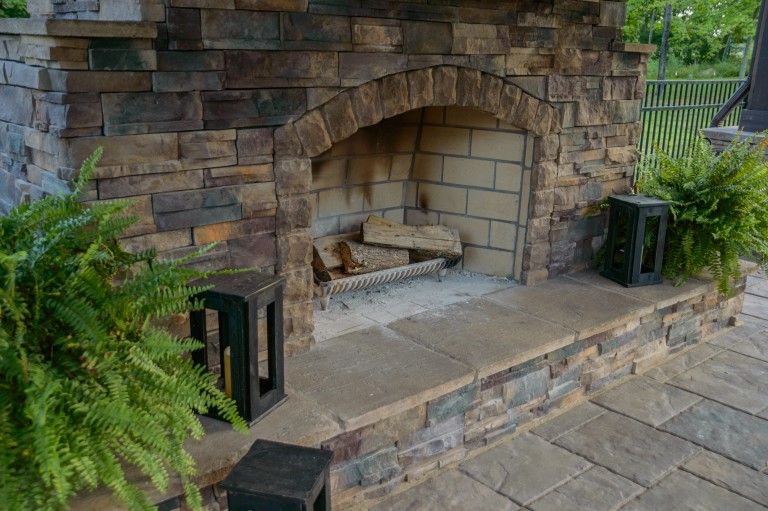
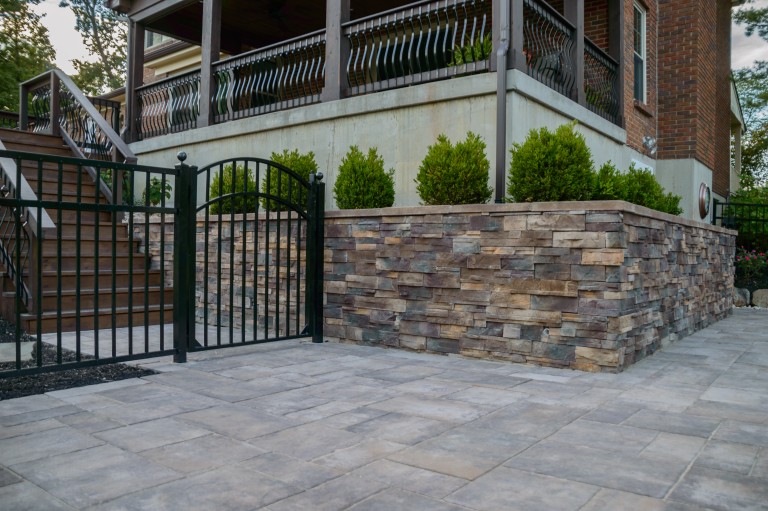
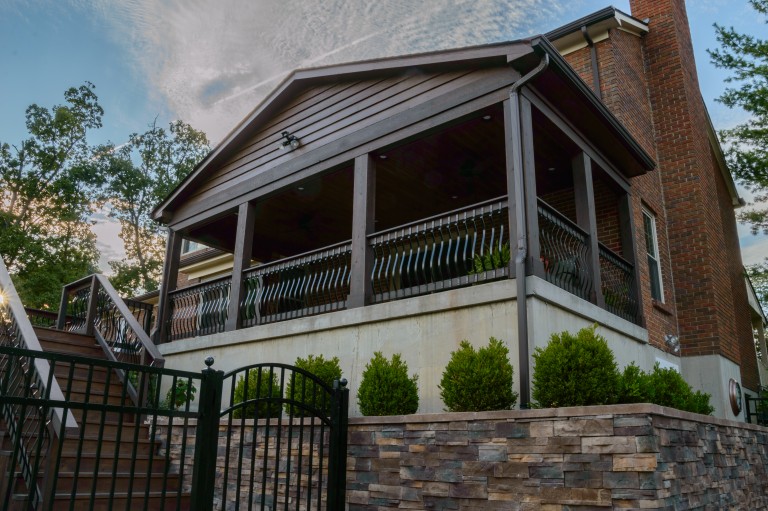
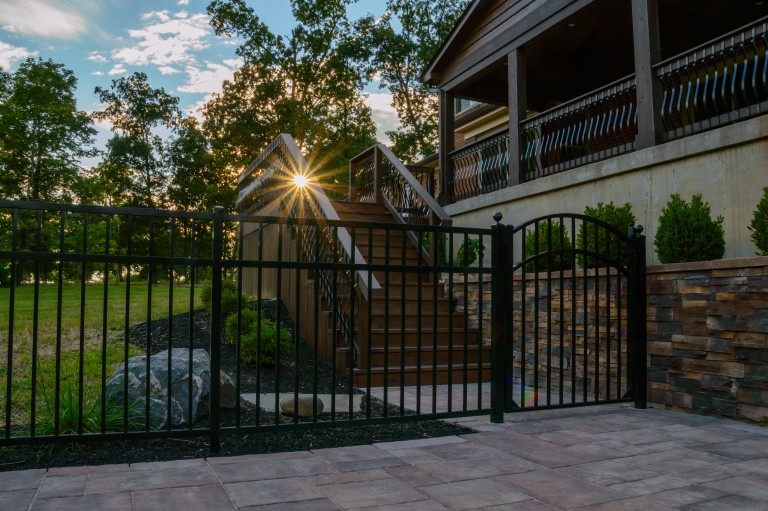
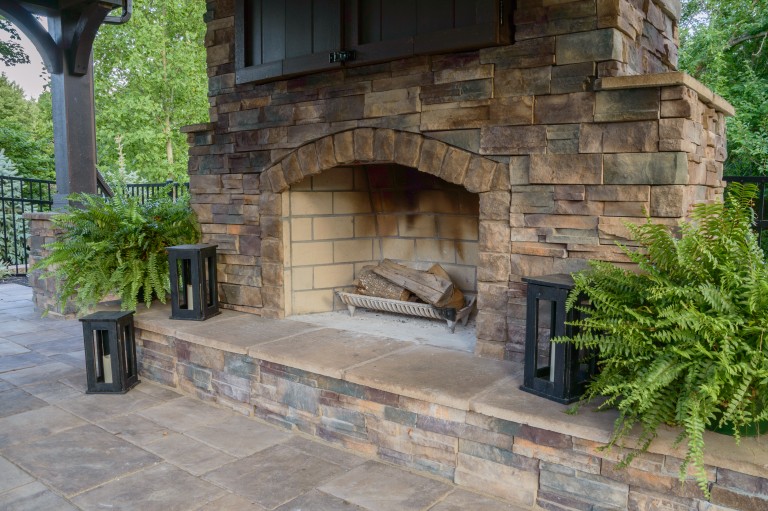
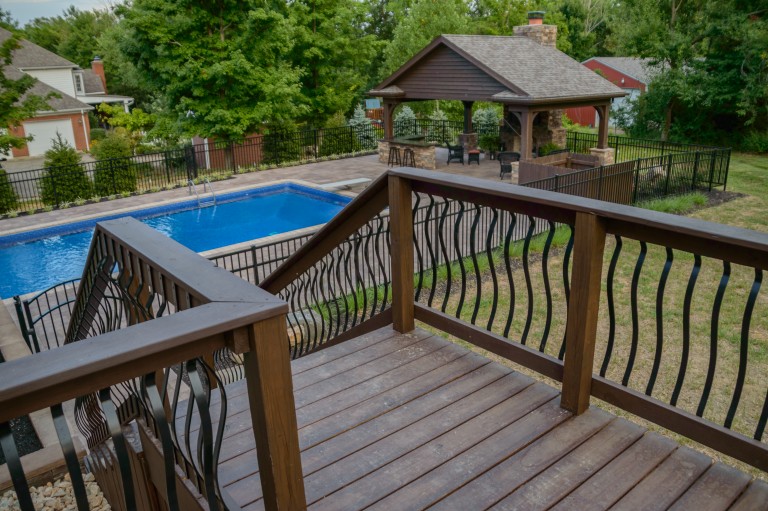
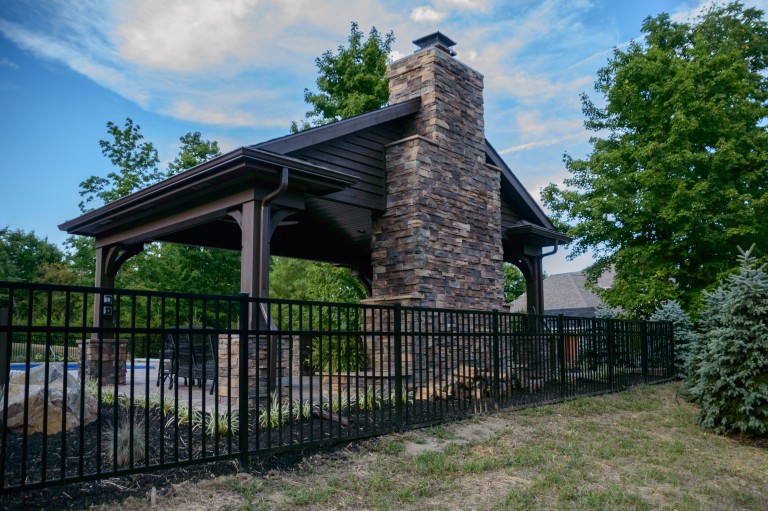
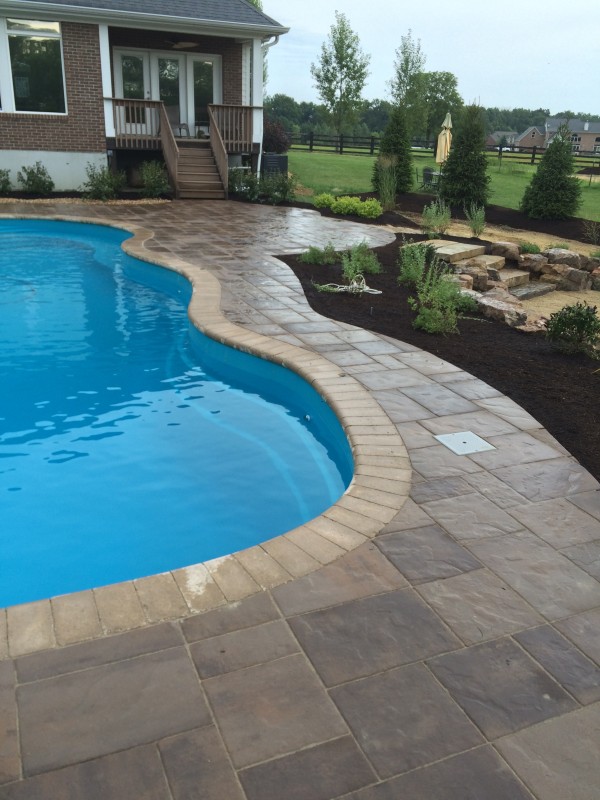
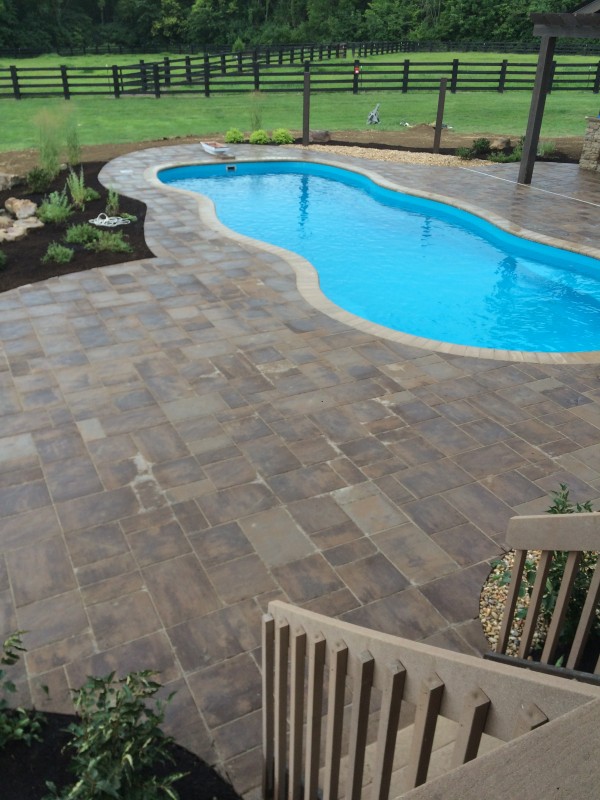
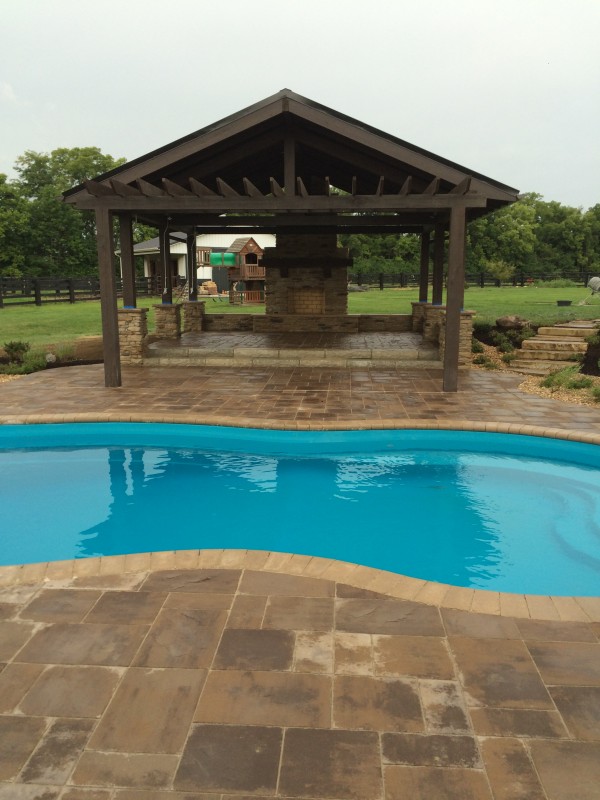
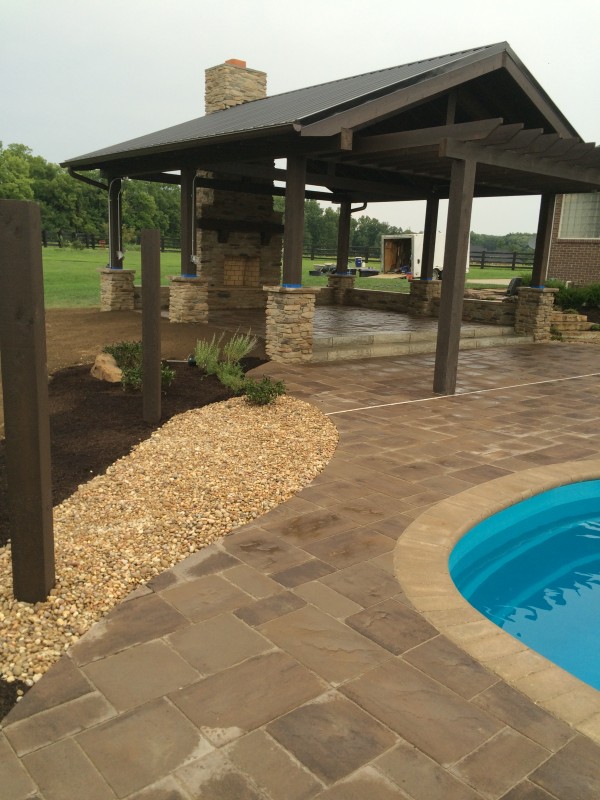
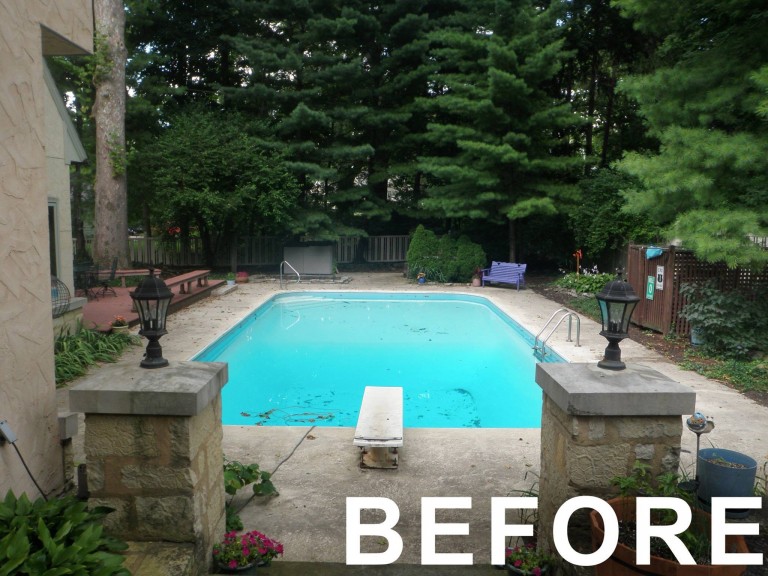
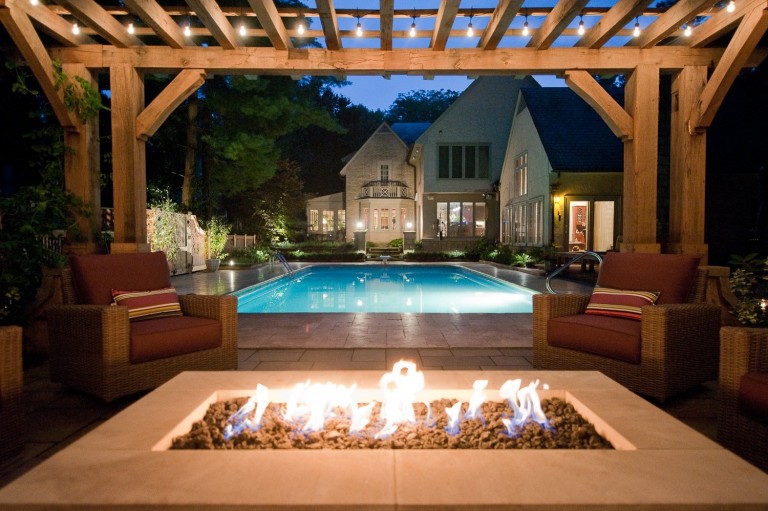
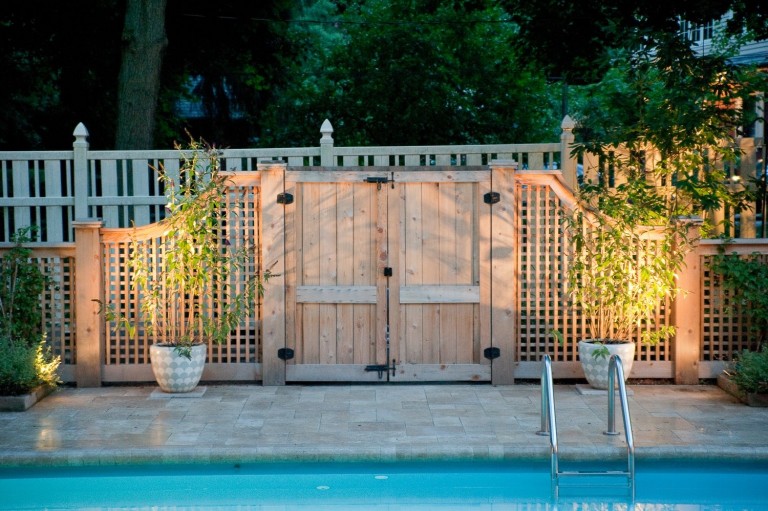
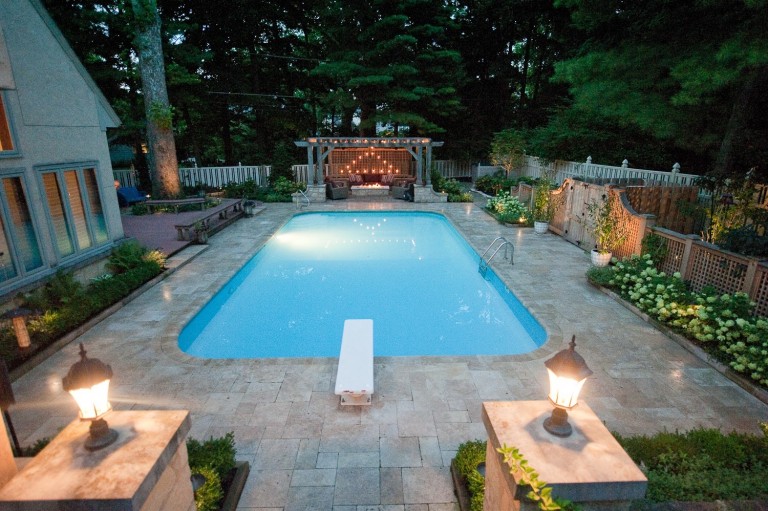
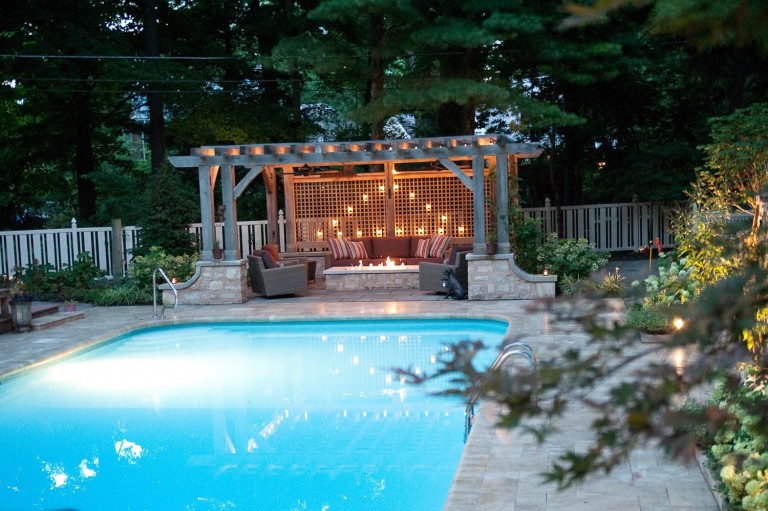
This is a project located in the Liberty Township area. Our client contacted us with the request to renovate their existing pool and outdoor living space. We modified their existing porch to be more open. We installed new railing and installed a grand step addition down from their porch/deck. A new Unilock Beacon Hill Flagstone Paver pool deck, paver pool coping and a new pool liner giving the existing pool area a completely new look. Lastly, we designed a custom pavilion, wood burning fireplace and bar island. Added new landscaping and fence.
Check out the transformation.
BEFORE
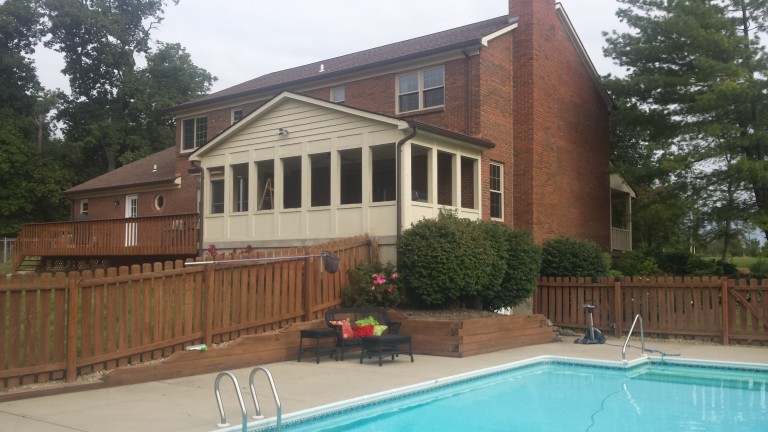
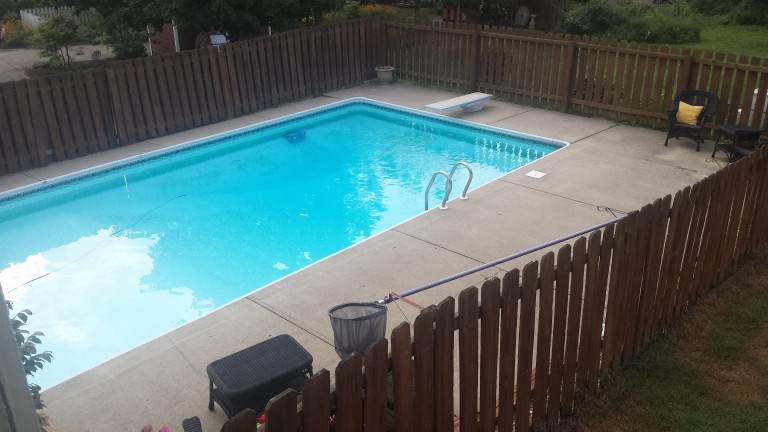

AFTER
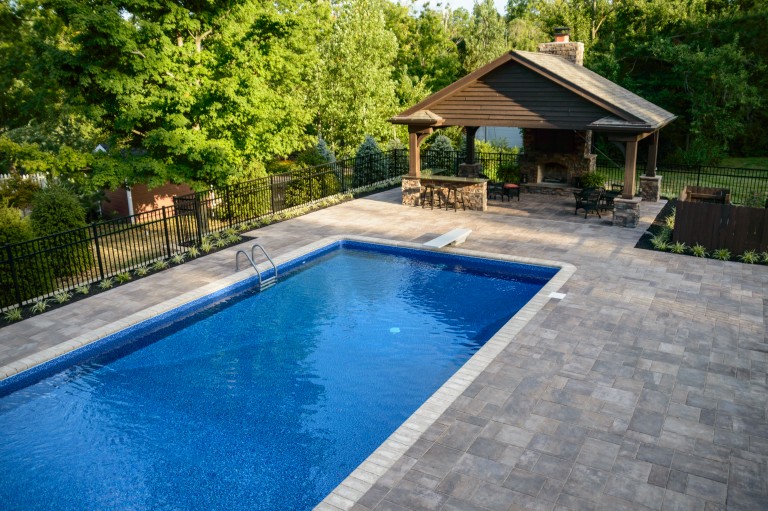

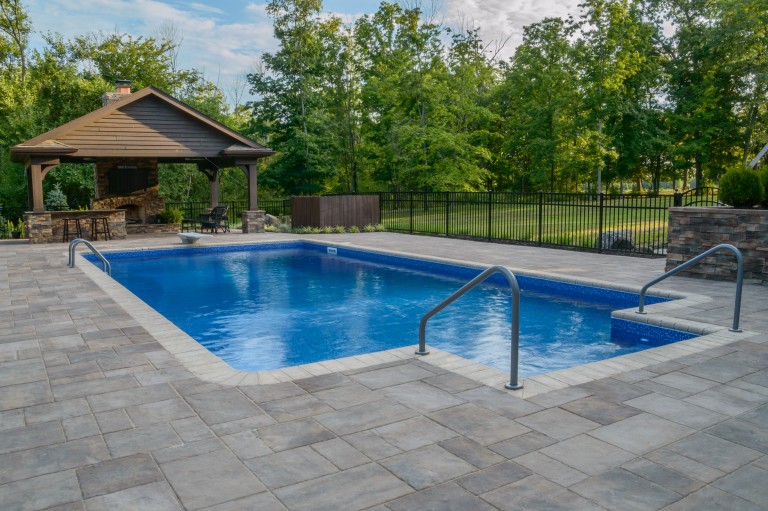
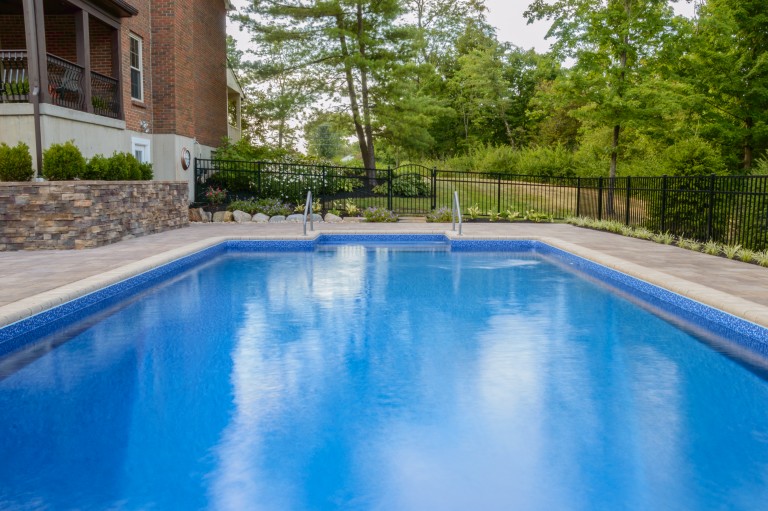
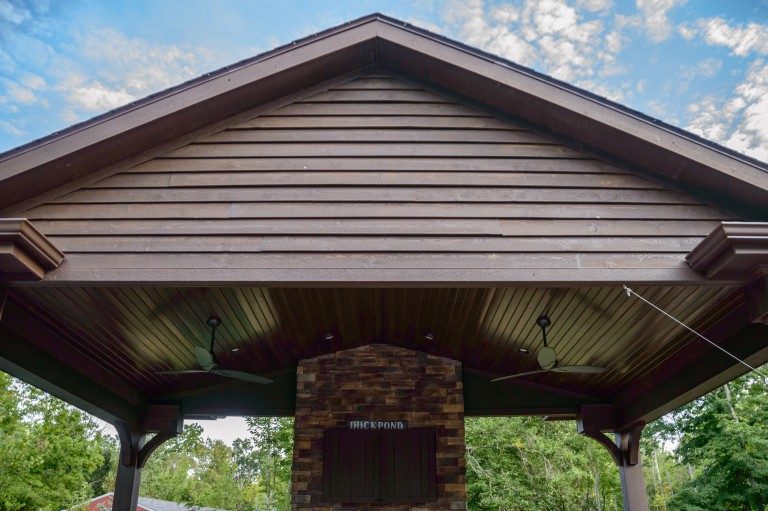
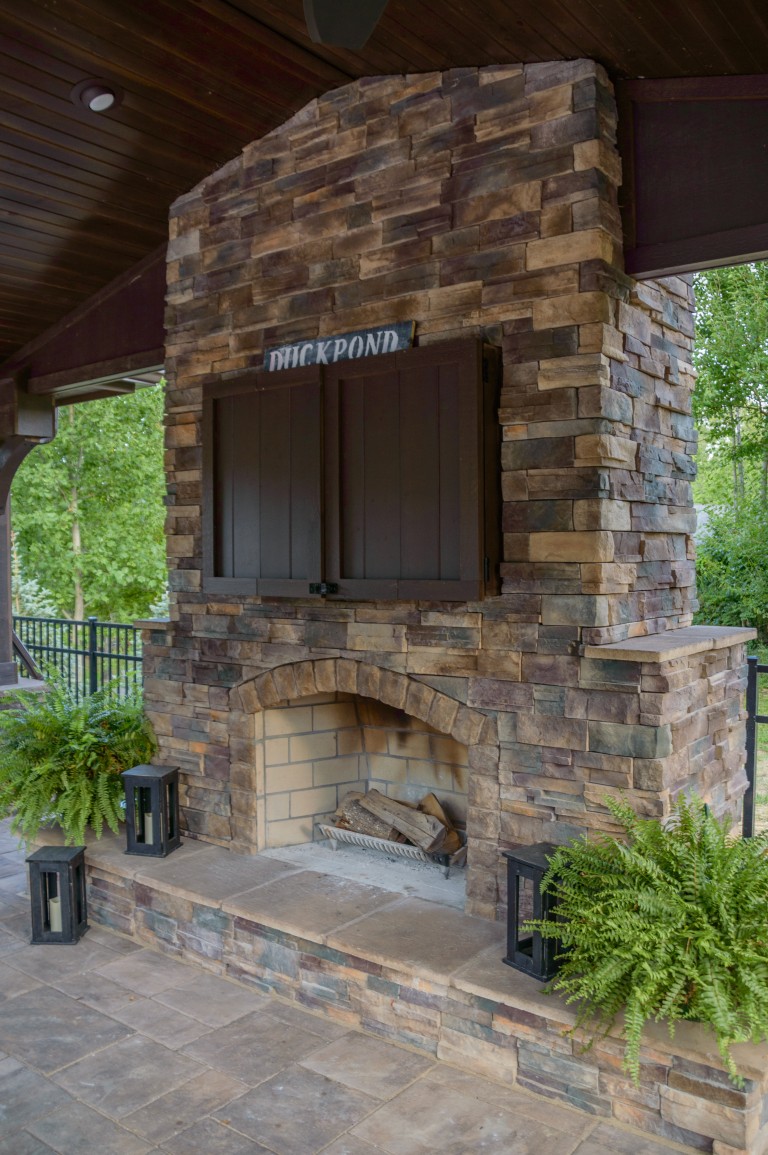

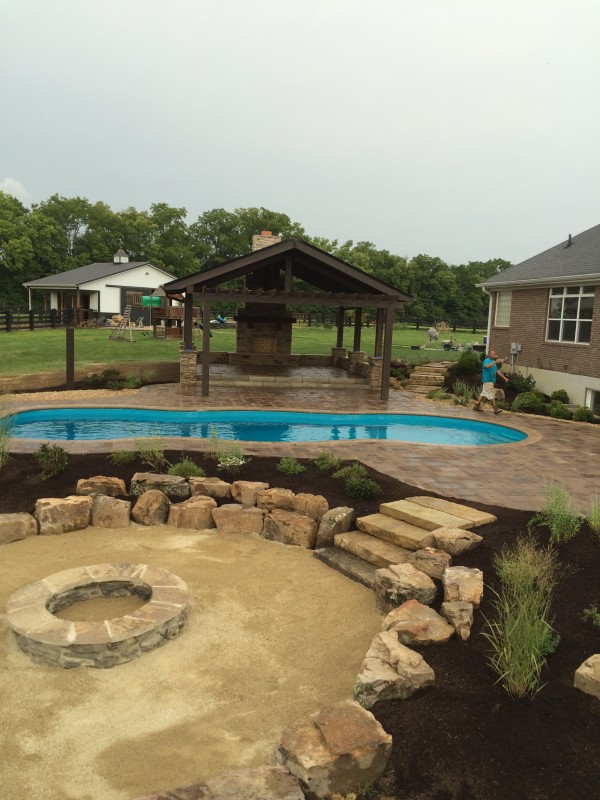
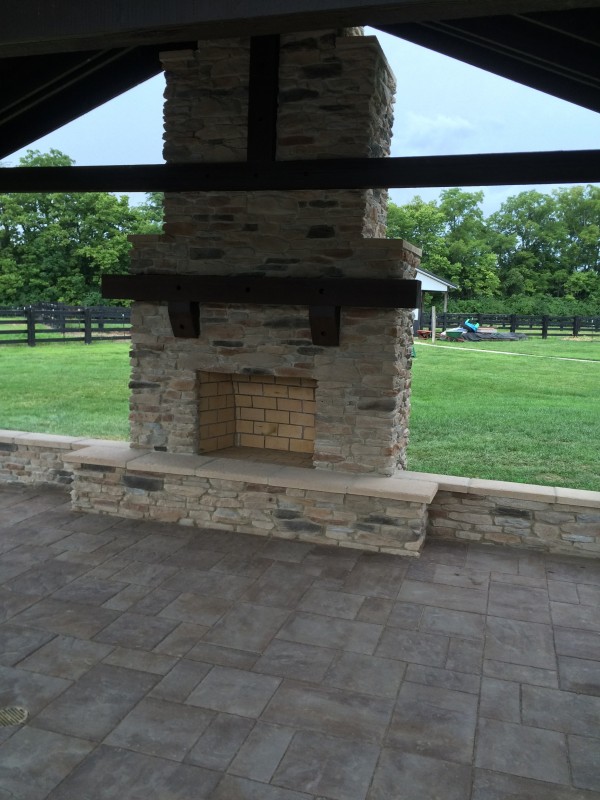
This is a project we completed in the summer of 2016. The projects includes a fiberglass insert swimming pool, custom designed and built cedar timber frame pavilion with pavilion, a stone masonry outdoor fireplace, paver stone pool deck and landscaping/landscape lighting. Professional pictures coming soon.
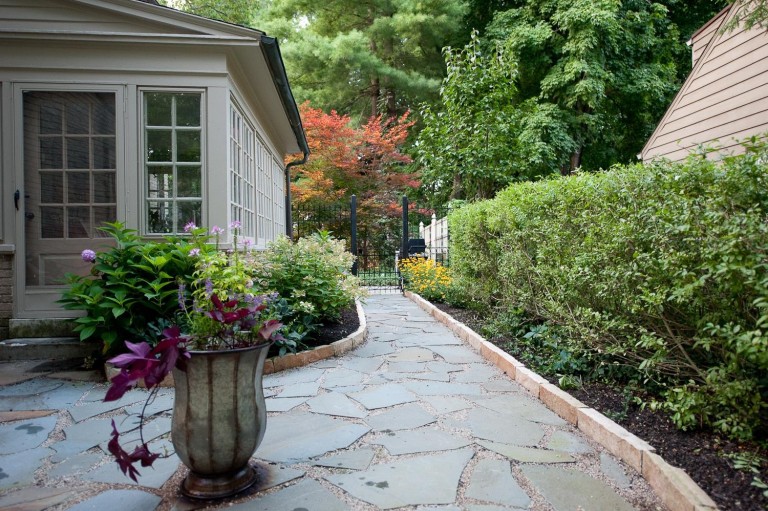
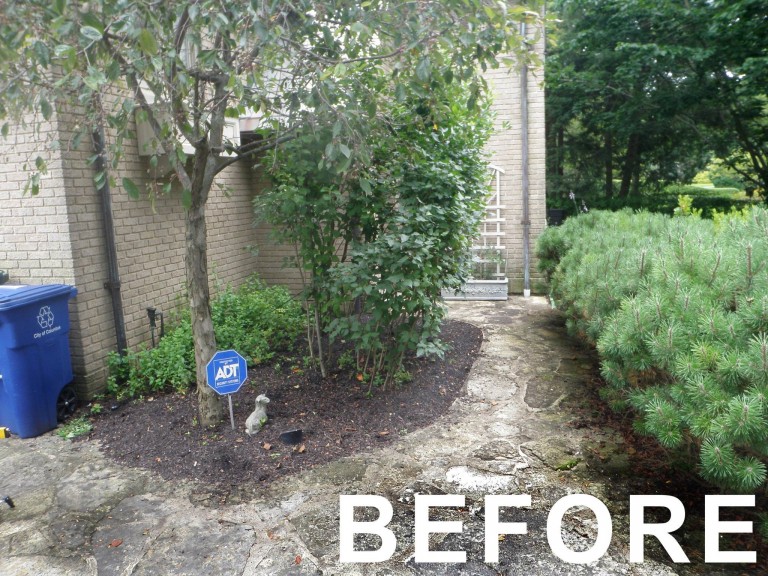
This is a complete property renovation that we completed summer of 2015 in the Columbus area. As you’ll notice in the before pictures, the pool was existing. We installed a new travertine pool deck and travertine pool coping with limestone curbing, irregular and dimensional bluestone patios and walkways, customer cedar fencing/gates, and a custom pergola built from white oak we sourced from a 100+ year old barn in Eastern Ohio. This project was designed by Outdoor Space Design.


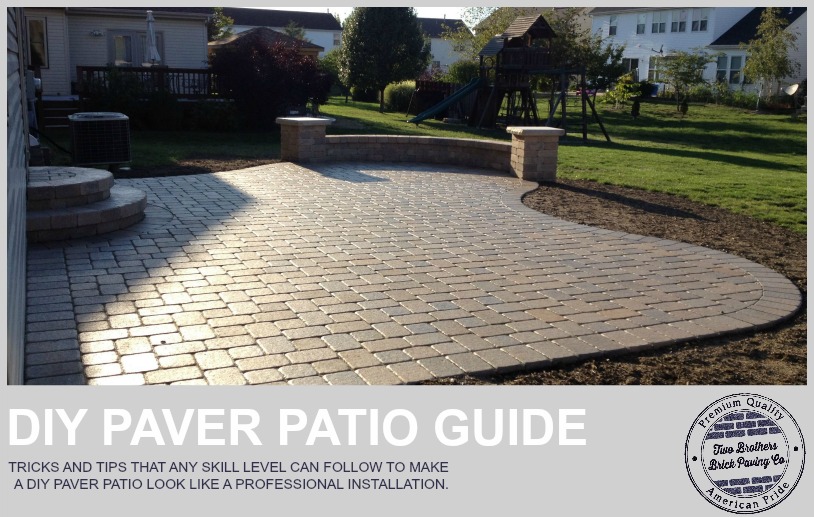
[box type=”download”] Thinking about installing a paver patio or paver walkway? Read this before you do. We offer a step-by-step installation guide for paver installation that will help you install a maintenance free paver patio (no weeds), a paver patio that doesn’t sink or settle and we’ll share 3 easy tricks that will make your paver patio not look like an amateur installation. [/box]
My name is Mark Rhodus, I’m the president of Two Brothers Brick Paving. I’ve been installing pavers for over 15 years. I was taught by a pioneer in the industry, the guy who installed the very first concrete paver in the United States. So tons of experience, tips and tricks that go back many, many years.
For many years, I’ve been asked by landscape architects and interviewed by industry magazines (like the Turf Design Build Magazine and Total Landscape Care Magazine) on how to properly install pavers. Throughout the years, I’ve taken what I’ve been taught and added to it as we learn more effective and efficient ways of installing pavers. I have a lot of potential clients call me ask if I can coach them through installing their paver patio. So, I’ve put together this guide, How to easily install a paver patio that doesn’t look like a DIY paver installation.
There is a lot of information on the internet on how to install pavers. I’ve always been amazed at how different each approach is. For the most part, these guides will get you from start to finish and you’ll have a paver patio if you follow the guide. However, what I think is missing from almost all of these paver installation guides is the years of tricks and techniques a paver installation professional puts into every installation to ensure that the paver patio will last and look like it was installed by a professional. It’s all in the details…but which details?
There are some common problems with most DIY paver patio installations as well as some misconceptions regarding pavers due to these improper paver installation techniques.
Prevent weeds from growing in your paver joints – this is huge.
I think the most common misconception that my clients have about pavers has to do with weeds growing in the joints of the pavers. Most people think these weeds grow up from the earth/dirt underneath of the pavers. That is incorrect. Weeds grow in pavers by seeds being blown onto the patio and depositing themselves into the sand in the paver joint. In my installation guide, I share two of the most important installation steps to prevent weed growth in pavers. None of our installed paver patios experience major weed growth in the joints for two main reasons:
- We control surface water. If rain water sits on your pavers and has no where to go, it will aid in the germination of weeds. A dry patio is key to preventing weed growth. In my guide, I’ll give you very detailed instructions on how to keep your patio dry and well drained. Also, a well draining paver patio helps naturally wash and remove seeds from the surface and joints of the patio before they have the opportunity to germinate.
- The sand that paver joints get filled with can be a breading ground for weed germination. So, over the years, we’ve discovered a couple different techniques and treatments that make the sand in your joints inhabitable for weeds. One of these treatments turn the joint sand hard like mortar making it impossible for weeds to grow. The second is an alternative type of sand that is readily available that will achieve similar results. In my guide, I’ll explain exactly how to decide which treatment is best for your paver patio and exactly how to do each process the easiest way possible.
[box type=”download”] Following my steps for preventing weed growth in your pavers will give you peace of mind and prevent a ton of unnecessary maintenance down the road.[/box]
Proper paver base installation is the key to a long lasting paver patio. Make sure you’re installing it correctly and using the correct paver base material.
There is a specific type of gravel that works best for paver base. When installed correctly, this type of gravel turns into hard surface similar to concrete. Most DIY installations don’t use this type of gravel. I’m guessing because they just don’t know about it. In my guide, I’ll share with you the exact gravel that we use for all of our paver installations. Gravel is named by numbers at the quarry. However, these numbers are different from one quarry to the next. I’ll share with you exactly what to ask for to make sure you’re getting the right stuff.
Once you have the right gravel, you’ll have to know how to install it. However, before you install and compact the gravel base, you’ll have to compact the soil that you’re going to put your gravel base on to. Without doing this step, you’re patio could quickly settle more than 1/2″ in 90 days or less. Most DIY guides do not mention how to compact the soil. I’ll share with you a trick to compact the soil using a little bit of your gravel base and a plate compactor.
Now that your soil, aka subgrade, is solid and compacted, you’ll need to begin installing your paver base. You’ll need to rent a vibratory plate compactor to properly install the paver base. Without it, your pavers could easily settle more than 1/2″ in 30 days or less. Every tool rental store across america rents these for about $50 per day. In my guide, I’ll show you how to properly use the plate compactor to achieve the best results. We recommend that a typical paver patio base be 6″ thick or deep. However, most plate compactors can’t compact 6″ at a time. I’ll share with you exactly how often you need to compact and also a trick to make sure that every inch of your patio has received proper compaction.
I’m sure if you’ve been doing some research on how to install pavers, you probably already were aware that you had to compact the gravel base. However, 9 out of 10 DIY paver patio installations don’t do this crucial step during the installation of the paver base. In order to achieve near complete compaction (if not your pavers will settle), you paver base must have the correct moisture content. This means that you must add water to the base during compaction. Water lubricates the particles in your gravel base making it easier for the gravel to consolidate and become compact. Adding to much water and you may have to remove all your gravel and start over. I’ll share with you an easy trick to know when your paver base has the proper amount of water in it to achieve optimum compaction.
Cheap insurance that add’s many years to the life of your paver patio.
There is a single step that you can do when installing your paver base that will add many years to the life of your paver patio and also compensate for any DIY mistakes made during base installation. Its cheap and easy to add, yet most DIY and even many professional installations leave it out. I’ll share with you exactly what it is and how to install it.
3 Easy ways to make sure your paver patio doesn’t look like an amateur installation.
When I consider doing any DIY home improvement project, what typically prevents me from going through with the project is my fear that my lack of experience doing this type of project will show in my work and decrease the value of my home instead of increasing it. So as I’ve put together this guide, I’ve thought about common flaws DIY paver patios have and how to show an amateur how to easily prevent them. I’m thrilled with the results. I think there are 3 common flaws on DIY projects that could be easily avoided and drastically improve the quality of the project making it look like it was professionally installed. Here they are:
- Wavy Pavers, a paver patio that is not flat is a dead giveaway that it was installed by an amateur. If you look across a paver patio and it appears to roll up and down instead of staying flat and sloping at a consistent slope across the entire patio, chance are that patio was installed by an amateur. In my guide, I’ll show you how to easily prevent this from happening during the installation process. These couple extra steps we do will make a huge difference in the finished look of your project. I’ll also share with you a really neat trick with a plate compactor that will smooth your pavers out like glass after installation.
- Curvy joint lines ruin a paver installation. The line that is made from the joints in the pavers must be straight. If it’s not, it will not look like a professional installed it. There are two steps to ensuring straight bond lines. I’ll show them both to you as well as how to straighten the bond lines once the pavers are installed (of course before you cut in the perimeter).
- Bad cuts. I can always tell a DIY paver installation by the cuts. If the cuts aren’t perfect, it makes the rest of the project look cheap. But making perfect cuts takes years of experience. We’ve developed a way to make perfect cuts every time by simply adding a paver border around the perimeter of your patio. I’ll show you exactly how in my guide.
Get my “How to easily install a paver patio that doesn’t look like a DIY paver installation” for $35.
In addition to showing you how to prevent weeds from growing in your pavers, making sure you get the right paver base, the importance of water in paver base installation, cheap insurance and 3 ways to make sure your paver patio looks professionally installed, I’m also going to:
1. How to calculate exactly how much paver base and sand you’ll need
2. What tools you’ll need
3. The products (edging, gravel, sand sealer, polymeric sand, etc) we use after years of trial and error
To receive a copy of our instructions on how to install pavers that last and look like a professional installation, simply click the yellow ‘Buy Now’ button below. We process our payments through Paypal for security reasons, However, it does not require that you have a Paypal account.[/box]
Vinyl liner pools have a lower initial cost and a customizable shape, but you frequently replace the liner. Fiberglass pools are easy to maintain, quick to install, and very durable. They cost more upfront and aren’t as customizable. Concrete pools are extremely durable and customizable but require heavy maintenance, the highest costs, and a slow installation.